TUTORIAL
Account Management
How to register and access LINKZ
- You can download LINKZ from Google Playstore. Click here to download, or you could just type "LINKZ".
- You can register and login from the website to access LINKZ directly via desktop.
Managing Account and User **
- The menu for your company information can be found on Setup > Company Setup > Overview.
- Make sure to input the data correctly, especially for the User and Location. You can input more than one location that you wanted to manage and monitor (e.g. Warehouse in Jakarta, Surabaya, and Medan).
Basic Setup for Transaction and Finance of your Company *
- Go to Setup > Company Setup > System.
- Click Edit on the top right corner of your screen.
- Choose your transaction approval method.
If only one person managing the apps, it is highly recommended to use the automatic approval method.
If someone have to review the transaction, best to use the manual approval method. By choosing the manual method, each order made will be in the Approver Menu first before it can be processed further. - Choose your payment method and currency.
- You can activate and inactivate the report of payable and receivable account (such as report on sales, purchase, etc).
- Go to Replacement Menu if you want to return and exchange the product with the new one. You can go to "Actual Invoice" to immediately changing the invoice without replacing with the new one.
Add New User and Change User Data
- Go to Setup > Manage Users.
- Click "+" on the top right corner of your screen.
- Complete the required data (marked with *).
- Choose the Authority for the user. Below is the details of the access for each roles:
- Superuser: Full access and control
- Seller: Sales, Warehouse (overview and management only)
- Warehouse: Warehouse (except Reconciliation)
- Finance: Finance, Warehouse (overview only)
- Approver: Approver Menu
- Buyer: Purchases, Warehouse (overview and management only)
- You can mark a user as inactive. If they marked as inactive, they cannot access your company database anymore.
Inventory Management
Add New Product
- Go to Setup > Warehouse Setup > Product List.
For your convenience, you can contact us to help you to import all of your product.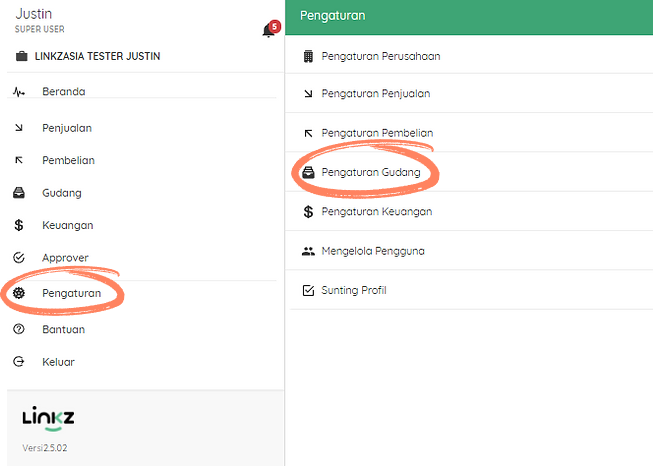
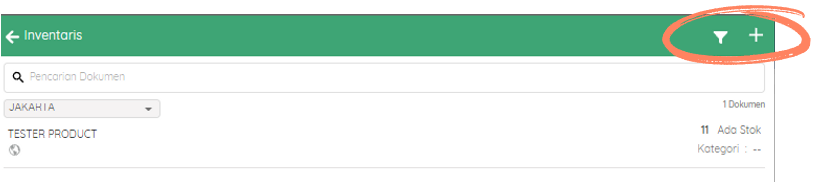
- In the Product Setup, click "+" on the top right corner of your screen. There's also a Filter Button to search for a certain customers.
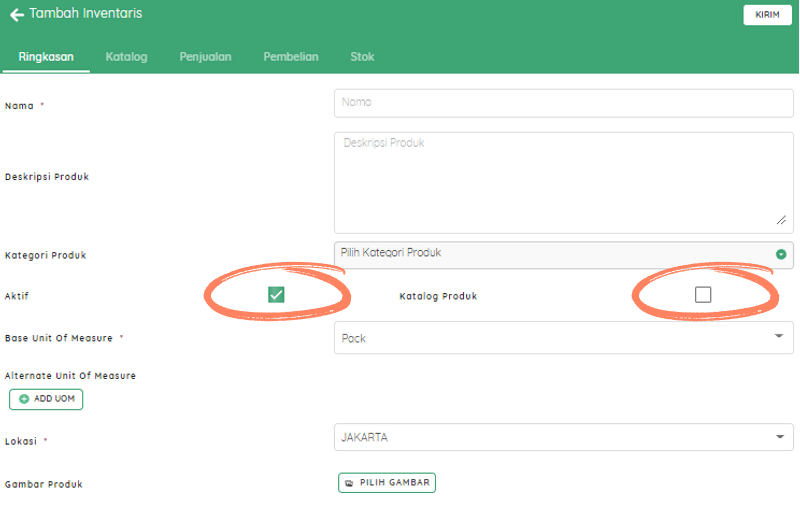
- Complete your product information (product name, unit of measurement, warehouse location, product images, etc). Don't forget to mark the product as active to have them available and orderable. Also, you can mark the Product Catalogue to have the product appeared on your Digital Catalogue.
- You can set other additional information such as brand and model to your product that will appear on your Digital Catalogue.
- You can add, change, or replace the number of stock in the menu. You can also set the minimum stock that is available for your product.
Receiving Product
- Go to Setup > Warehouse Setup > Receive. Then, select the transaction that you need to confirm the status of the stock received at the Warehouse.
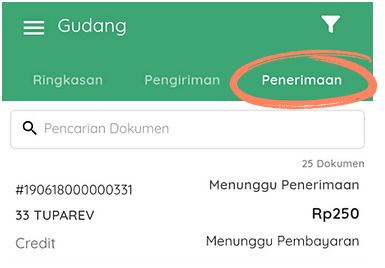
- Select the product and quantity you want to receive and return. You can add some notes regarding the received product.
- If the product are received and the documents are confirmed, click Product Received.
Shipping Product
- Go to Setup > Warehouse Setup > Shipping. Then, select the transaction that you need to confirm the status of the stock shipped from your Warehouse.
- Select the product and quantity you want to ship from your Warehouse. You can add some notes such as the Driver's name and the Vehicle License Plate Number. To confirm the shipment of the product, click Ship Product.
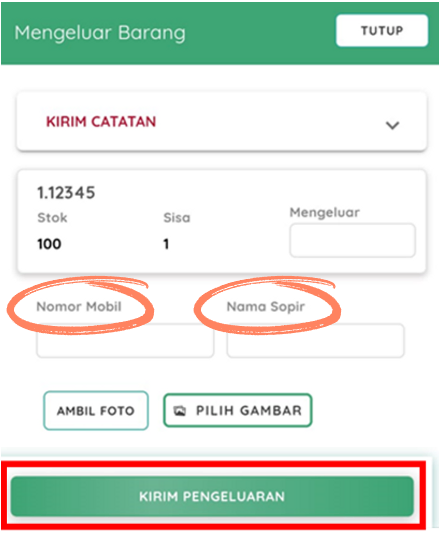
- If the product is returned and the product replacement is applied, you can do a reshipment.
Sales Management
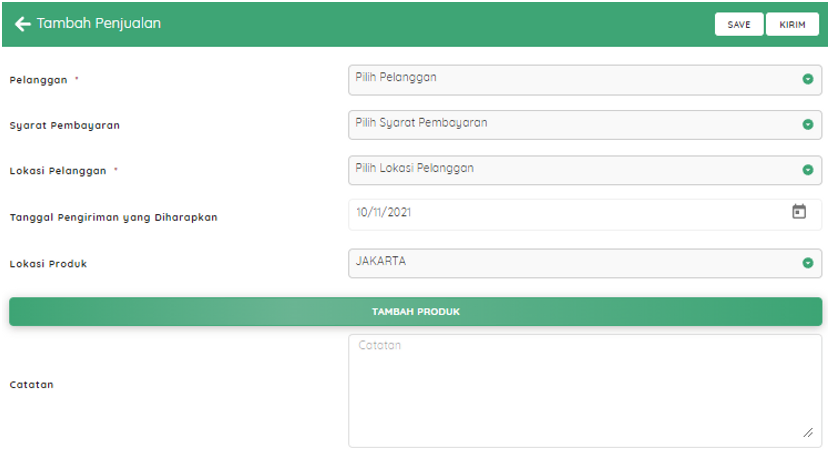
Add Sales Transaction
- Go to Sales Menu, then click "+" on the top right corner of your screen to add a new transaction.
- Complete the transaction information (customer name and location, payment method, delivery date, and your delivery location). If your customer is not registered yet on your LINKZ account, you have to register your customer first in Setup > Sales Setup.
- Click Submit, then your order is forwarded to Approver Menu (if you use the manual approval method), or to Warehouse Menu directly (if you use the automatic approval method).
- If you need to track the process of the transaction, you can found it on Sales Menu. You can view the process of order placed, delivery, payment, and transaction completed.

Purchase Management
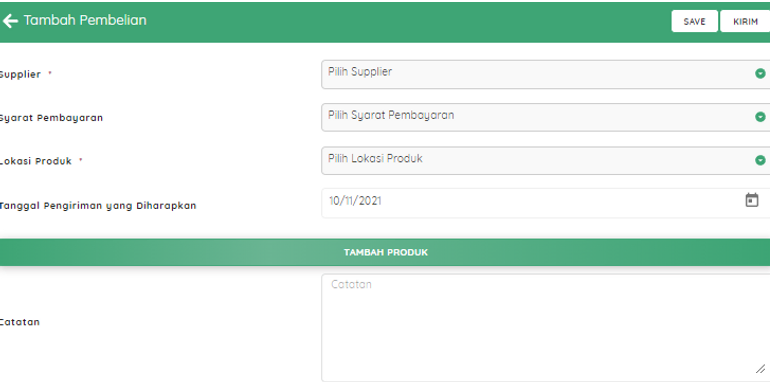
Add Purchase Transaction
- Go to Purchase Menu, then click "+" on the top right corner of your screen to add a new transaction.
- Complete the transaction information (supplier name and location, payment method, and delivery date). If your supplier is not registered yet, you have to register your supplier first in Setup > Purchase Setup.
- Click Submit, then your order is forwarded to Approver Menu (if you use the manual approval method), or to Warehouse Menu directly (if you use the automatic approval method).
- If you need to track the process of the transaction, you can found it on Purchase Menu. You can view the process of order placed, delivery, payment, and transaction completed.

Purchase Through Catalogue
- Before the buyer could access and make purchase through catalogue, make sure that their supplier has added them as supplier's Online Customer. It can be found on Setup > Sales Setup > Online Customer.
- Go to Catalogue Menu on the left side of your screen. Select the catalogue from your supplier.
- Select the product you want to purchase by clicking "+" or "-" to set the amount.
- Click Cart on the top right corner of your screen to review the product you want to order. After checking, click Place Order to proceed your order to the supplier.
- If you use the manual approval method, you have to go to Approver Menu to approve the transaction then forward it to your supplier.
- The transaction will be recorded automatically in your purchase. After your supplier done the delivery, there will be a confirmation menu in your Warehouse Menu to confirm you have receive the product.
Setting Details
Customer Setup - Supplier Side
- Go to Setup > Sales Setup > Customer Setup.
- Click "+" on the top right corner of your screen to add a new customer.
- Complete the customer information. If you don't have enough information, you still have to fill the customer name and location.
- Click Submit on the top right corner of your screen.
Online Customer Setup
- Go to Setup > Sales Setup > Online Customer.
- Complete the customer information (email, phone number, and warehouse location to send the product).
- If your customer is already listed in the Customer Setup, make sure the email and phone number listed is exact the same.
- You can mark your customer who are no longer active by mark as inactive.
Price List Setup
- Go to Setup > Sales Setup > Price List.
- Click Filter on the top right corner of your screen, then select your customer.
- You are able to customize the price as you want. Same item, different price for each of your customer.
Supplier Setup - Customer Side
- Go to Setup > Purchase Setup > Supplier Setup.
- Click "+" on the top right corner of your screen to add new customer.
- Complete the supplier information. If you don't have enough information, you still have to fill the name and location.
- You can set the categories for each of your product. Go to Setup > Purchase Setup > Product Category.
Warehouse Setup
Add Product
- Go to Setup > Warehouse Setup > Add Product.
- Click "+" on the top right corner of your screen to add product.
- Complete the product information (name, description, and unit of measurements).
- If you want to add category to the product, go to Purchase Setup > Product Category.
- Add the location where the product is stored on which warehouse.
- Add images to your product (optional). You can take a photo from LINKZ or upload from your gallery.
- Mark the product as Active to ensure that your product is able to be traded. Mark the Product Catalogue to ensure that your product is on your Digital Catalogue on LINKZ.
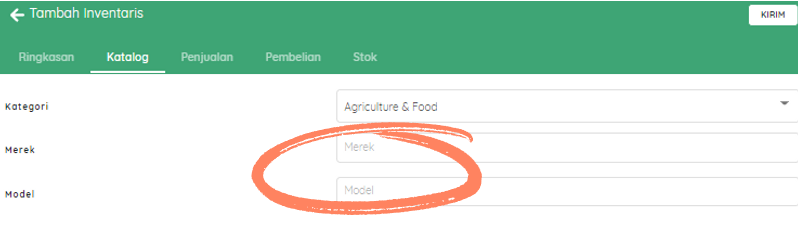
Complete the product information to be shown on Digital Catalogue
- On the top menu, go to Catalogue tab.
- Choose the category that provided by LINKZ.
- Fill the brand and model of the product (optional).
Complete the product information for Sales
- On the top menu, go to Sales tab.
- Choose the currency that want to be used, then input the sell price, and discount (with minimum quantity if needed).
Complete the product information for Purchase (optional)
- On the top menu, go to Purchase tab.
- You could choose the Supplier.
- Input the buy price, discount, and choose the currency that is being used.
- In this section will be shown the record of your purchase and buy price.
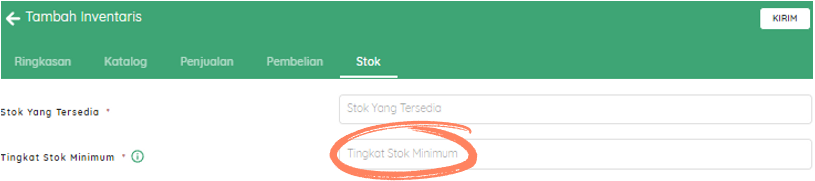
Complete the stock or product information manually
- On the top menu, go to Stock tab.
- You can input the amount of your initial stock and the minimum stock limit of your product.
Finance Setup
Payment Method Setup
- Go to Setup > Finance Setup > Payment Method.
- You can create a new payment method or choose the available method by LINKZ.
- You can disable a certain payment method by click the unwanted method, then mark as inactive (only applies to the payment method that you create).
Add Bank Setup
- Go to Setup > Finance Setup > Add Bank.
- Click "-" on the top right corner of your screen.
- Mark the bank you want to use for transaction, then click Submit.
*Some of them only able for Superuser
**Only able for Superuser
**Only able for Superuser
